4. Microphone Solutions
For visual communication and collaboration it is a fact that
the sound quality is even more critical than the video quality.
In fact, it may be possible to have some kind of
communication with a far end part experiencing a bad picture
quality provided that the sound quality is good. Unfortunately,
in the opposite situation with good video quality and bad
sound quality it is impossible to have a useful outcome. Therefore,
microphone and audio solutions must be considered carefully.
As a basic rule one should always remember that microphones
are 'stupid' in the sense that useful sound is not separated
from useless noise.
Tabletop microphones
When a small group of people are gathered around a table,
the most common solution used is a tabletop microphone, as
shown in the pictures below.
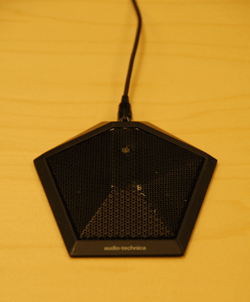
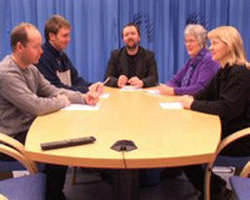
The tabletop microphone may be a reasonable good solution
provided that:
- there are not too many persons around the table, so that
they may all be seated with almost equal distance to the
microphone, as demonstrated in the right picture. If the
distance becomes too large, there could be used an additional
microphone.
- the microphone is not centered at the table, but instead
placed at one of the ends, as demonstrated in the right
picture. A tabletop microphone is normally directional
, i.e. it is more sensitive in a specified angular
section. The input signal from a person behind the microphone
may be too low to be detected. The microphone should be
placed so that all persons will be covered by it.
However, tabletop microphones introduce challenges with respect
to noise. The placement on the tabletop implies sensitivity
to different kinds of noise from the surrounding people (irrelevant
small talk, paper bending, moving of coffee cups, watches
and pieces of jewelry hitting the surface, unconscious knocking
with fingers, pens etc.). In the room where the noise is actually
made, the people will hardly hear it, as we are more or less
accustomed to these kind of sounds. But for people at the
far end part the sounds become irritating and often untenable,
and the noise may drown out the speech. Some of these problems
with mechanical transferred noise from the surface of the
table may be reduced by using a small and soft pad under the
microphone. The pad should be less than the area of the microphone.
However, strong dicipline with respect to own behaviour is
essential for people participating in a videoconference.
Ceiling-mounted microphones
Microphones mounted in the ceiling are often used in 'passive'
rooms designed for receiving (as opposed to hosting/broadcasting)
video lectures, i.e. rooms where students receive lectures
by a videoconference. Ceiling-mounted microphones provide
an effective method for picking up questions and comments
from the audience (all of whom are roughly at the same distance
from the microphones), without the hassle of tabletop microphones
or wireless mics.
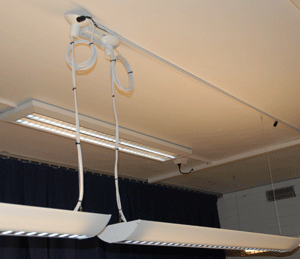
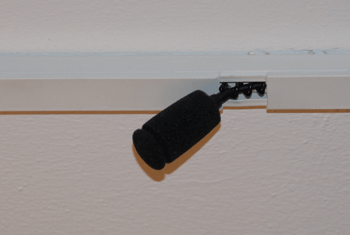
On the left-hand picture we see two ceiling-mounted microphones,
which in this case covers a meeting table for 10 - 12 persons.
On the right-hand picture one of the microphones is zoomed
in.
Ceiling-mounted microphones do have several pitfalls, however:
they are susceptible to ambient noise from ventilation systems,
lighting armatures, noise from adjacent rooms and stepping
sounds from the floor above. Also, if the walls in the room
are very acustically reflective, the reflections are easily
picked up by the ceiling-mounted microphones. The main challenge
with ceiling-mounted microphones is fine-tuning involved to
make them pick up sound from the audience, while suppressing
unwanted ambient noise from ventilation fans etc. As explained
earlier, it is important to realise that sound quality is
more important than picture quality in a video conference.
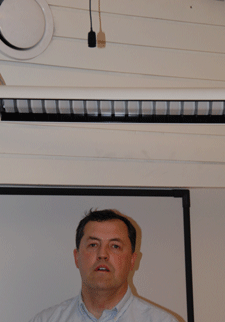 |
In this picture we see a lecturer standing in front of a
whiteboard with a ceiling-mounted microphone over his head.
This is not an optimized solution; if a room is designed for
hosting/broadcasting lectures, ceiling-mounted (and tabletop)
microphones will not pick up the lecturer's voice properly
as he is moving around and turning his head in different directions.
A lecturer will need to use an auxiliary microphone - a so-called
wireless microphone. |
Wireless microphones
For a lecturer a wireless microphone is normally the best
solution. As shown in the picture below, we see that a wireless
microphone system consists of three fundamental parts:
 |
- a microphone recording the voice of the lecturer,
- a transmitter, which is connected to the microphone by
a thin cable, and
- a receiver that receive signals from the transmitter and
sends the signal to an audio system or a videoconferencing
codec.
|
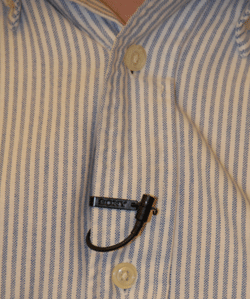
There are two types of wireless microphones (often denoted
'lavaliere' microphones):
- attached to the lecturer's clothes, as demonstrated in
the left-hand picture below, and
- attached to the lecturer's cheek, as shown in the right-hand
picture below,
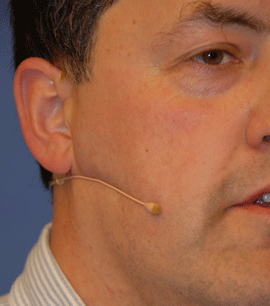
Wireless microphones attached to the cheek work the best,
because this type of microphone gives a consistent sound level/quality,
no matter how the lecturer's head is orientated. The disadvantage
is that this solution might be quite expensive. Wireless microphones
attached to the lecturer's clothes are less suitable because
the sound level decreases when the lecturer's head turns away
from the microphone. This type of microphone is also very
susceptible to handling noise (from clothes etc). But this
type is often less expensive and, normally, a better solution
for a lecturer than a ceiling-mounted or tabletop microphone.
For both types of wireless microphones, the transmitter is
attached to the lecturer's belt or pocket, as demonstrated
in the left-hand picture below. The cable between the microphone
and the transmitter should be hidden inside the shirt to avoid
destruction of the cable/microphone/transmitter (see the right-hand
picture below).
|
 copyright
2005-2007 MECCA Consortium
copyright
2005-2007 MECCA Consortium